Sunday, May 7, 2017

Particle Effects

Today's topic is particle effects. This is a topic that somehow always fascinated me and at the same time something I had some problems with in the past. For this game I'm using a quite novel idea, nothing very fancy and nothing that hasn't been done before, but still something novel.

 Instead of creating and animating particles on the CPU, I'm using a set of 3 texture buffers that I rotate around in the fashion not dissimilar to the way triple buffering works. Each pixel in these buffers represent a single particle or to be more precise its location in world space and a life counter. I don't need to store the velocity of particles as I always have the position of them in the last two frames. With some shader magic and a few extra textures as input I can do all the physic simulation needed to animate the particles in the fragment shader - and it's a pretty simple fragment shader (computation wise).

For this particular project I will need about 40 000 particles at most, because I don't want too many flashing, disorienting fountains of colour all over the place as in some other game, and the particles will only be used for fire effects and some other generic magic spells. I can squeeze all the particles I need into a 256x256 texture (well textures and most of them 16 or 32 bit float) and still have over 25k particles to spare.

If at some point ovedraw will be a problem I can render the particles to a half size buffer before composing them with the rest of the scene (and that's the default for lower graphic settings).

Because I'm using deferred shading it would be a sin not to render the particles as soft particles, I got the depth buffer anyway... but there is also a downside. The original implementation of the particle system was made to render some of the particles using additive blending and some using alpha testing, but since I'm composing the particles and the rest of the scene  at different times it's kind of hard to use both additive and alpha blend ... so I got rid of the alpha testing and just add all of them in the same way. I won't be able to render black smoke or blood splatters but I didn't want them anyway.

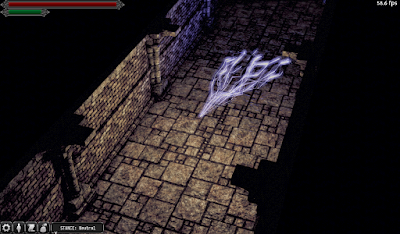
Making all the textures and emitter properties will most likely take me a week or two, so have a early proof of concept render of some fire:
  

Thursday, May 4, 2017

GUI, GUI never changes...

...unless you resize the window

Anyone that knows me, knows how I love making any sort of user interface. I just loathe it. When I started the project I knew I would be using the build-in Panda3D DirectGui, it's not perfect, it's not that easy to use but it is integrated with the scene graph that p3d provides. Moving, scaling, rotating parenting one element to another just works. Unfortunately not  always. From the wide array of widgets provided by DirectGui I ended up using just few and all of them hacked one way or another. Recently I had to give up on the DirectScrolledFrame  and roll my own using two clip planes and a scroll bar. That took me a day, but now 90% of the GUI is done. The remaining 10% is just connecting buttons with functions but I can do that only when I actually write the functions.

I've also made some visual changes and arranged some widgets in other ways. All buttons got a extra decoration, a pixel of width added here and a pixel of width removed somewhere else. The font got a bit bigger. The health and cooldown bars have been moved from the top left corner to the bottom right corner, not that I think it's better this way, the top left would be the better place but I'm lacking vertical space. I may yet move it back and maybe switch the inventory and character screens, but I'm not sure what's best. On a big display it's not a problem, but it's a different story if there are only 600 pixels of height. I also had to drop official support for 800x600 resolution, there's no way I can fit both the character screen and inventory in 800 pixels, the minimum  is 896. Even if I remove the frame and just draw a 1 pixel border I'm 16 pixels short of 800. It's just not worth it, and I think that any machine that is limited to a 800x600 display won't be able to run the game anyway. If someone really needs to run on a tiny display, the window can still be resized, but at some point the widgets will overlap (if both inventory and character screen are opened at the same time).

Currently the GUI looks like this, some minor things may change, but it won't change much.
EDIT: Yeah, I did the change, here's the new look:

Design of the GUI

 Many games are guilty of very bad UI, sometimes it's obviously crippled design (like in Dragons' Dogma), sometimes looks are more important then ergonomics (most Asian MMOs ), sometimes it's the amount of buttons, icons and hotbars that's the problem (WoW) and sometimes it's not obvious at all that something is wrong with the GUI (like Diablo). 

For some unknown reason almost all cRPG developers make their inventory screen some variation on the Diablo design. There's a silhouette ('paper doll') with slots for equipped items and a grid of slots for other items all shown as icons. It's half bad if all items in the game have unique icons, but if the icons are reused - it turns into a nightmare. The only way to know the properties of an item is to hover the mouse over an icon and wait for a pop-up with more info. Sometimes there's info about more then one item so a player can compare items, but still it's done one by one. Doing anything with a inventory like this takes ages.

I decided to go a different rout, my inventory screen works like the detail folder view. The overall idea is similar to the Sky UI mod for Skyrim, only taking it a step further - all properties are visible at a glance and it's all text not icons. All items are show in a wide column with all the properties of the items show. Items can be sorted by all the possible properties both in descending and  ascending order. Equipped items are show with a different font colour. There are no cryptic icons, as long as you can read you will always know what you are looking at. There's no need for drag and drop, to equip an item click on it, to un-equip an item click on it. If you want to drop some items, you click on the 'drop items' button and a panel identical to what you see when looting containers appears - clicking an item now will move it from your inventory to this container, clicking items in the container will move them back to your inventory. Also using the inventory isn't a mode, the game is not paused, all keys still work, you can move, fight and cast spells with the inventory open. 

Maybe it's not the most beautiful GUI ever made, but it's functional and a lot more thought went into it then the look may suggest. I hope people like... if not it's easy to re-skin (just one image), the layout is a JSON file and the python code driving it will also be available as plain text - you can mod the hell out of it. 

Thursday, April 27, 2017

Slow progress is still progress

I haven't updated the blog in a while, but I have been working on the project. Most of it is mundane stuff like reading and writing configuration files (I abandoned the Panda3D .prc for the more common .ini), and little performance tweaks that I'm not gonna talk about. 

Lightning!


But lightning effects - now that's more interesting. For fire effect I have a GPU particle system that I can use, but that's no good for lightnings. What I did is made use of instancing and some noise generated in the shader. The lightning is generated as solid geometry, nothing more then a thin, long cylinder with multiple cross segments, the vertex are displaced using a simple-ish nose, stretched to the right length and rendered as many times I need and each instance can be rotated to make a fan.
Just by passing in different values to the shader I can now make any kind of lightning effect I need.
The glow-bloom pass adds .. well glow to the lightning effect, and a extra point light moving along the lightning ray gives a nice visual effect.


GUI

Programming GUI is always a pain for me. I'm not all that good when it comes to 2D graphics and I also always try to fit the UI on some small display whilst trying to make it readable on a big display, and at the same time make the widgets automatically resize to the window size and to draw it all with as few draw calls as I can... it's hell.
The layout, size and callback are all loaded from a JSON file and I'm using a small texture atlas to draw all the elements, so it's easy for modders to re-skin the whole thing. The texture atlas I use look like in the picture below and the final GUI look as show on the video:


Friday, March 3, 2017

Random Dungeon Show and Tell

The base for the level generation is done so I'm finally posting some images. Keep in mind that these are pre-alpha screenshots so the final version of the game may look quite different.
The above image shows how a level will look like in game (well, not that empty I hope), below are some  random levels generated using the algorithm described in the last post, I'm not yet 100% happy with the layout but it's a good start considering I'm only using 7 tiles (the final version should have around 200 different tiles). 


Wednesday, February 8, 2017

Random Dungeon

The first feature I want to talk about are the levels... well there are none, all of the maps will be generated as the player enters the dungeon/maze/crypt.

There are a few reasons why I won't be hand crafting each map. Time is one - if I want to finish this game in this decade I can't spend all my time designing levels. Random maps also let people play the same game multiple times, but there is a more important reason, although it may be important just for me - I'm making this game because I want to play it and unpredictable, random levels is the only way I won't know the layout of each map.

There will be some technical talk now, if you're not interested in how random level generation works, you might as well stop reading now.

This is not a new concept, rougelike games have been doing it for decades and there's a lot of material on this topic on the net, yet I think I may be doing something new here.

Most algorithms I've seen use the concept of rooms and corridors. You first put rooms in your map and then connect them with corridors until each room is somehow connected to all the other rooms. Some algorithms work by 'digging' tunnels and then expanding some of them into rooms using cellular automata or some other clever tricks.

In my approach there are no rooms, there are only equally sized tiles, rooms and corridors are emergent, they are created when tiles connect in the right way - and they can only connect in the right way.

But before we get to tiles, let's talk about grids. In my system the grid is needed only for checking if a new tile can be placed in a certain part of the map or is that place already occupied by some other tile. The grid could be triangular, but that's very limiting (you can only have 2 tile shapes - with one or with two connections), a hexagon grid is very interesting but a bit harder to make (there can be 5 types of a tile with 1 connection and there can be 1,2,3,4 or 5 connection - that's a lot of options!). A square grid will do just fine and it also fits the typical dungeon/maze shapes.

As I said all tiles have the same size, this makes it easy to put them in the grid, each tile takes up exactly one 'space'.  Each tile also has exactly one way to connect to already placed tiles and can have multiple ways to connect future tiles (on a square grid tiles can have 3, 2 or 1 'out' connections arranged in a few different ways). Connections are part of the tile, if the tile is moved or rotated, the connections move and rotate with it.

The algorithm works as fallows:
0. If there are no tiles, place a tile, store its position in the grid.
1. Select a random connection and check in the grid if the location of the connection is free (if not, remove this connection, plug the hole if needed, and redo step #1)
2. Select a random tile and put it in the location of the selected connection, rotate the tile if needed.
3.Store the tile location in the grid, if there are still open connections go to step #1.

The downside of this algorithm is that it can produce closed loops before a level is big enough, but that can be fixed by replacing a tile in a corner by a tile with 3 open connections. If the algorithm made a closed loop it is guaranteed that there will be a tile with 1 connection in the leftmost column of the top row (and also every other corner of the map). The good news is that it's simple, every tile is reachable and you can control the shape of the level by giving weights to each tile type (more 3-connection tiles=more rooms, more 1-connection tiles where the 'in' and 'out'  connections are opposite = more straight corridors, more 2-connection tiled = maze).

I'll post some examples later, when I have enough tile types ready.

Monday, February 6, 2017

So it begins...

It's always hard to tell where things begin. Beginnings are kind of fuzzy, but you got to start somewhere, so I might as well start here... or rather now.

So here and now I draw my line in the sand  - let it be known that on this day, the development of the game Darkward has started.

In the fallowing days, weeks and months I'll try my best to first describe how I imagine this game, then regularly post progress reports as the game takes on shape. For now I'll just say it is going to be a dark 3D action RPG with some Rougelike elements - a game closer to Diablo1 then Dark Souls 3.

Wish me luck.